Summary
This tutorial covers how to build a static web site, hosted on Github for free, using Quartz as a framework and Obsidian as a backend IDE.
Requirements
Before started, make sure that you have the following requirements.
- Create a free Github account.
- Download Obsidian note taking app.
- Install Git, npm & node packages.
1. Download and Install Quartz 4.0 Static Site Generator
# Clone the original repository to your computer
# Choose a specific directory like Documents
# Open the terminal app and goto the documents
cd /Documents

# Clone the repository to your computer.
git clone https://github.com/jackyzha0/quartz.git

# Change the name of the downloaded repository folder name. I change the directory name as "teaching-blog"
mv quartz blog-teaching

# Goto inside the blog-teaching directory
cd blog-teaching

# Install required Quartz dependencies
npm i

# Compile the Quartz project
npx quartz create

# The Quartz project generator will ask you to choose some configs. You can select the default ones.

# For the content select -> Empty Quartz
# For the permalinks select -> Treat links as shortest path
# In the end you should see the following message;

# You're all set! Not sure what to try next? Try:
# - Customizing Quartz a bit more by editing `quartz.config.ts`
# - Running `npx quartz build --serve` to preview your Quartz locally
# - Hosting your Quartz online (see: https://quartz.jzhao.xyz/hosting)

# RUN THE Created Quartz site on your local computer
npx quartz build --serve

# You should see the following message few seconds later
# Started a Quartz server listening at http://localhost:8080
Open your internet browser and navigate to the web-site. You should see the following webpage.
http://localhost:8080

2. Setup Obsidian
-
Open the downloaded Obsidian note taking app. Hit “Open” and select the folder that you downloaded and renamed. Mine is “blog-teaching”
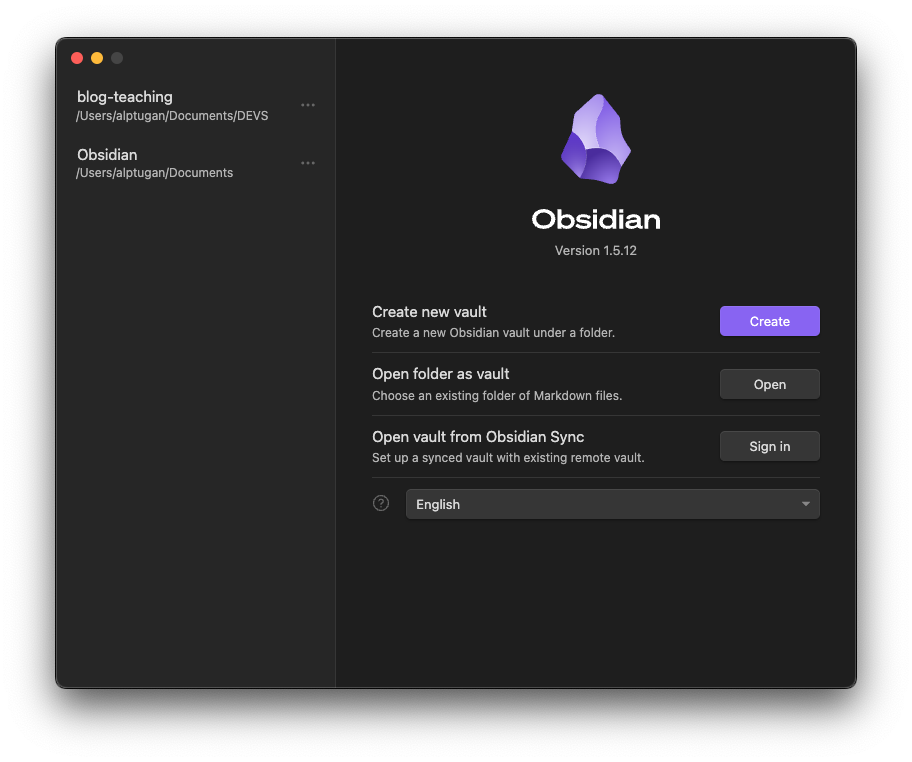
-
On the left pane you will see the same folder structure as it is on your Finder window. The “content” folder will be your main container for your individual posts.
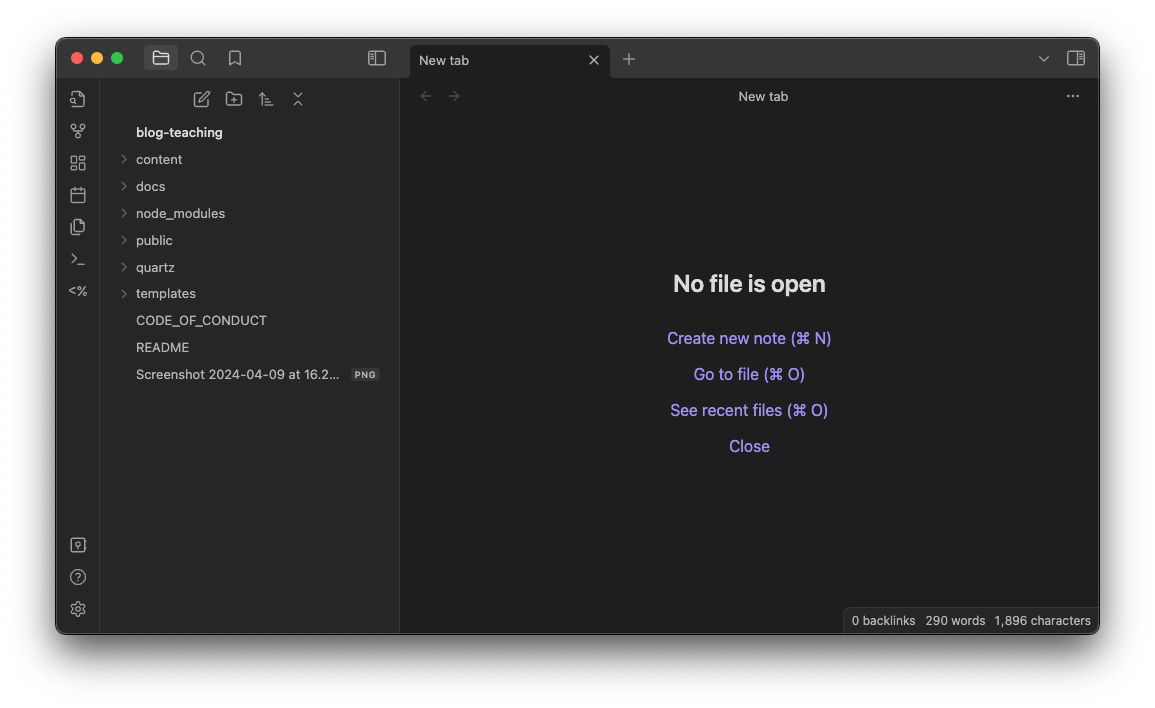
-
Before creating content we need to setup a page template including some default configuration. To do that, hit the ⚙️ icon on the bottom-left. Click on “Community plugins” and hit “Turn on community plugins.”

-
Hit the “Browse” button on the right.
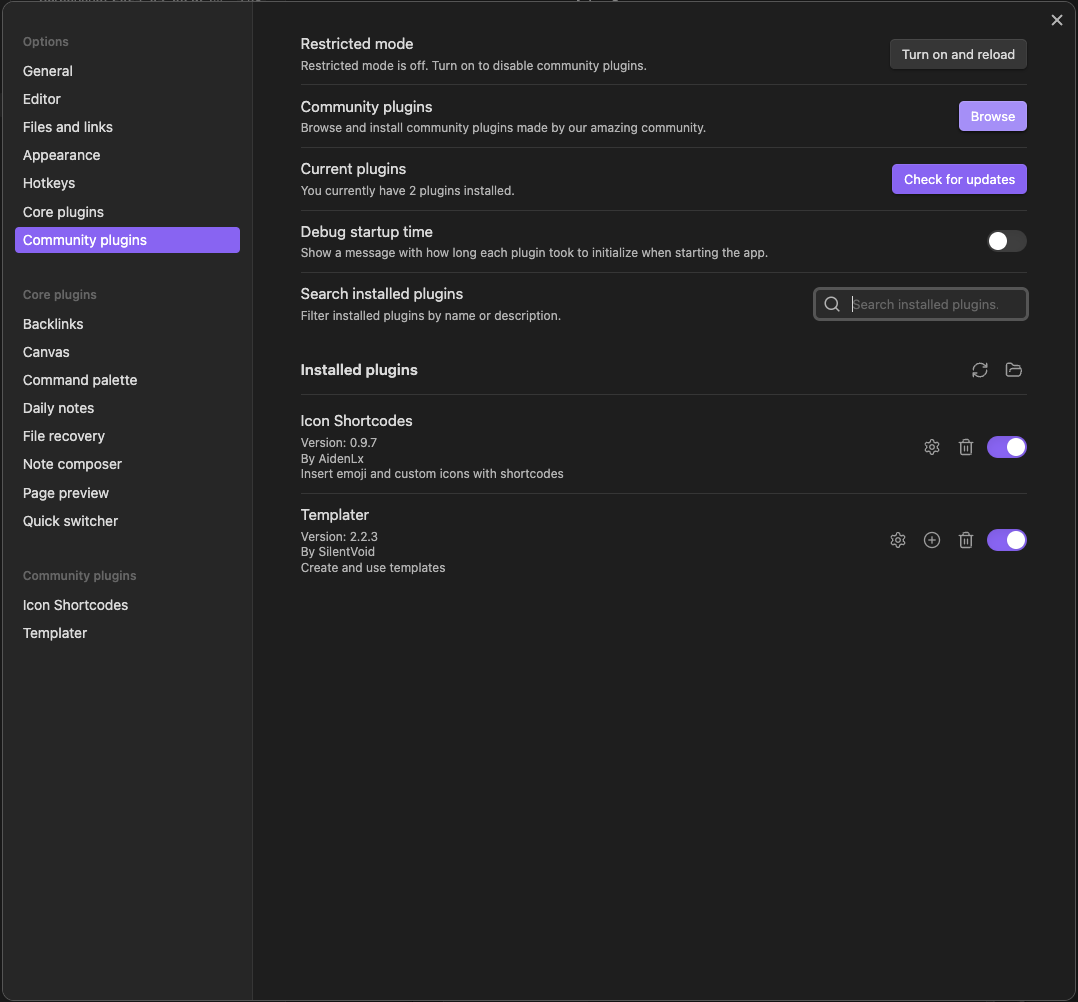
-
Type “Templater,” install the plugin, then hit “Enable.”

-
Close the settings window. Create a new folder on the left-pane called “templates.”
-
Create a new note with a name of your choice inside the “templates” folder. Mine mine is “note.” Type the following lines into the page.

Create your first page
Open the file that you created in the previous step. Mine is called “Quartz Tutorial.” Basically this page will be your first subpage of your blog.
-
Right-click onto “content” folder select “Create a new note from template” option. Select the template that we created in the previous step.
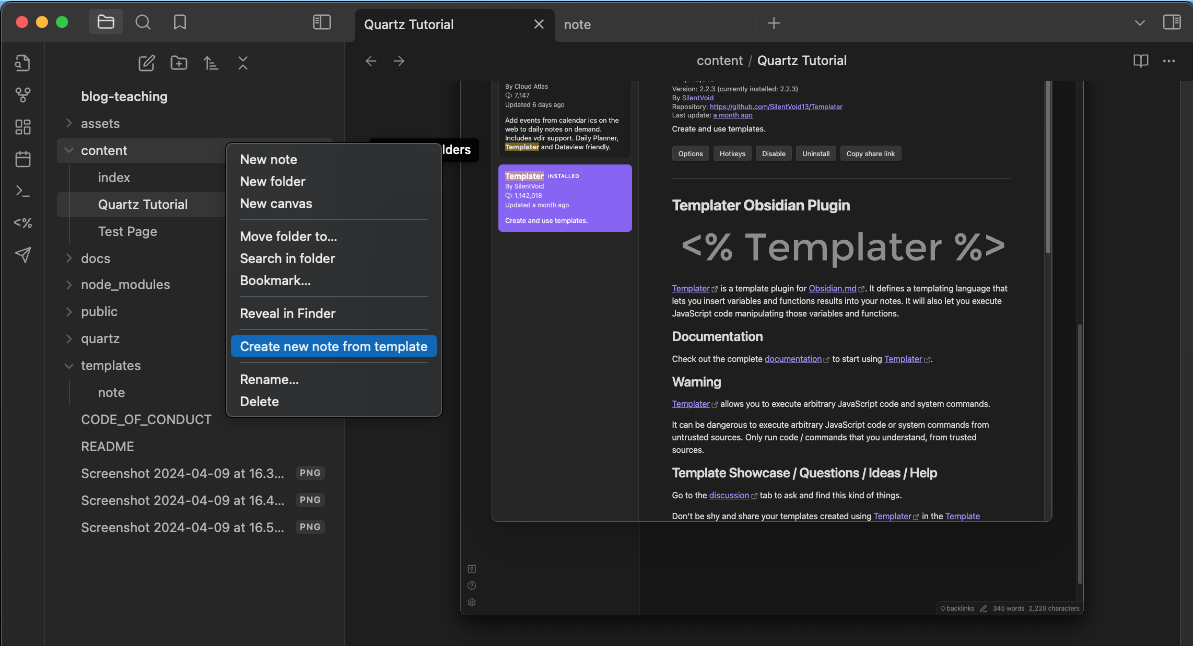
-
Click on the page and open it. Write down your content. Save it.
-
Check your browser and you will see the changes in real time whenever you edit the content inside Obsidian.
Images and Attachments
To handle images and attachments. Create a folder inside content folder. I create a folder named “assets.”
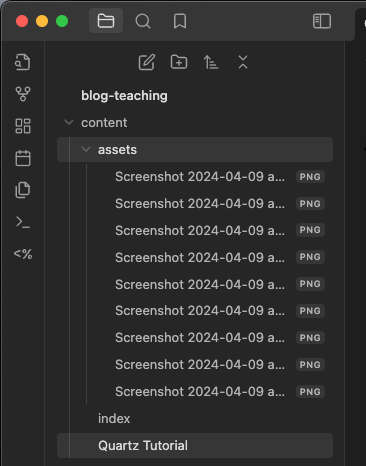
Open the Obsidian settings by clicking ⚙️ icon on bottom-left corner of the Obsidian app window.
Set the “Default location for the new attachments” to the folder that you created in the previous step. Then, an input fields appears. Select the “assets” folder inside the “content” folder. Whenever you drag-drop image from your computer to your page, the image will be uploaded to that folder. 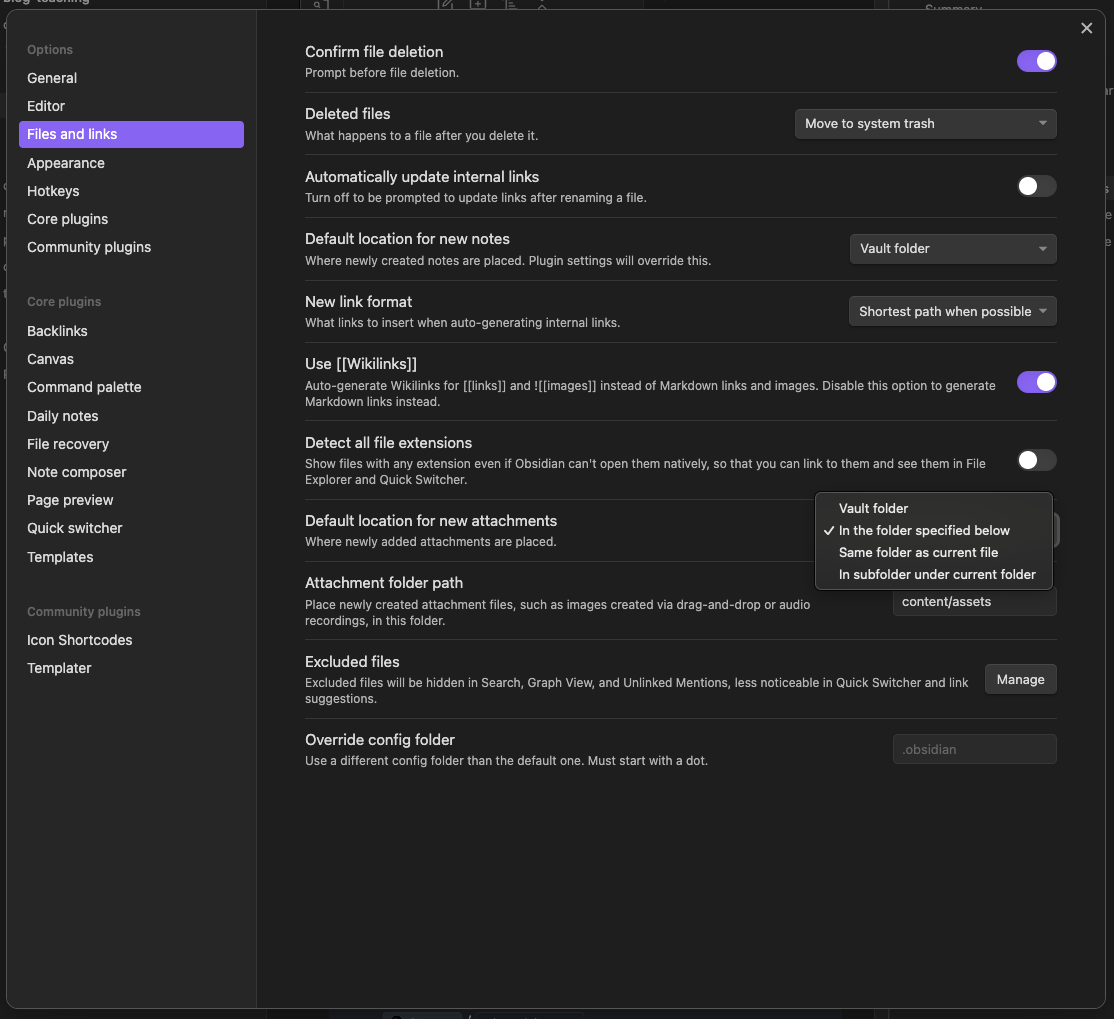
3. Upload the content to the Github
-
Sign-in your Github Account.
-
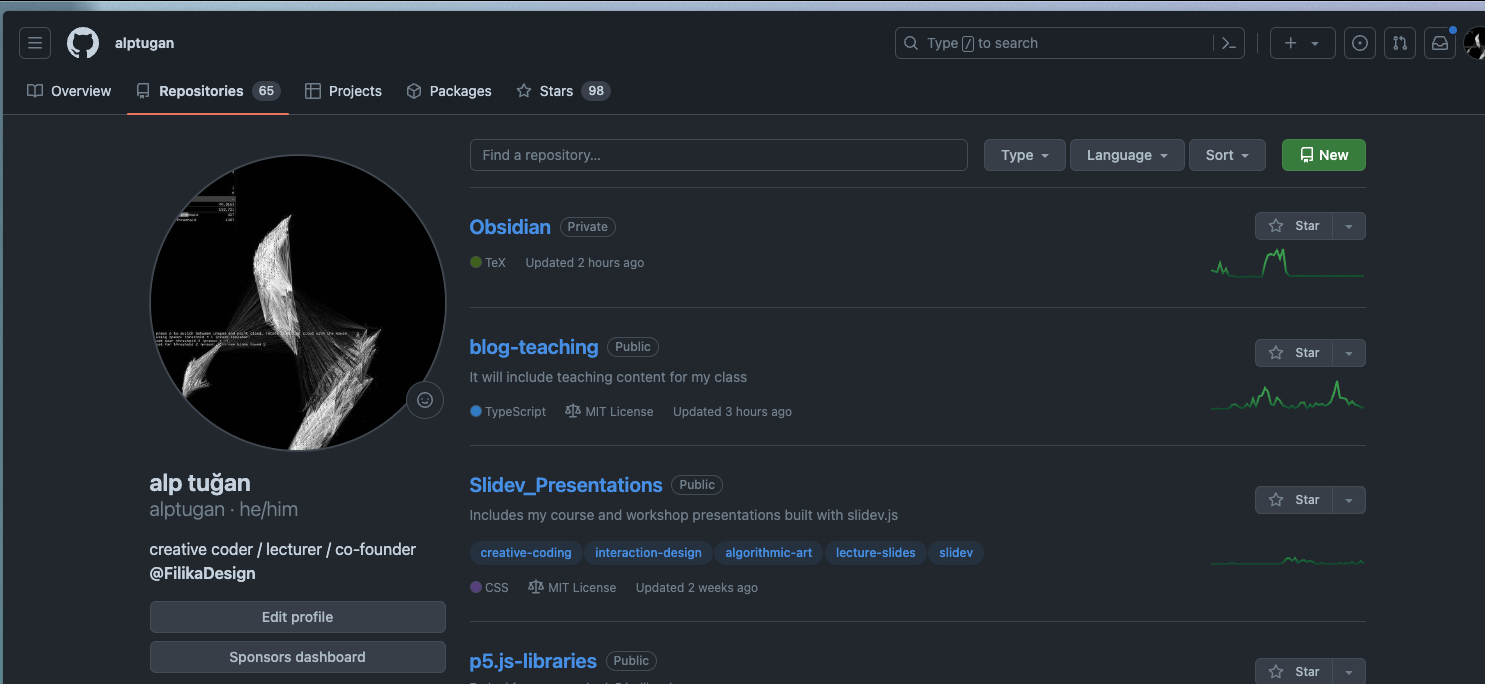
Create new repository to host the static web-site. Hit the green “New” button on the top-right of the page.
-
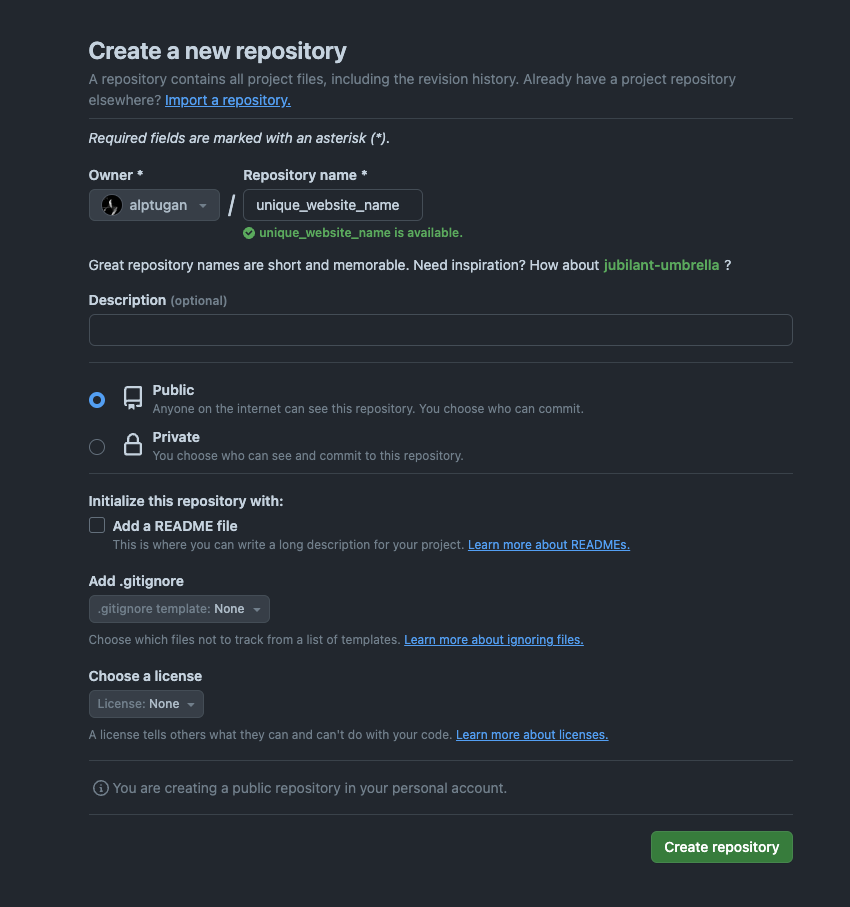
Type the name of your website. Mine is “blog-teaching.” Hit “Create repository” button on the bottom-right.
-
It will generate the repository page and list some options on how to upload your content to the page. Copy the link with
.gitextension. Mine ishttps://github.com/alptugan/blog-teaching.git -
Goto Terminal app;
# Hit Ctrl + c from your keyboard to disable local server
git remote -v
You will see the following message;
origin  https://github.com/jackyzha0/quartz.git (fetch)
origin  https://github.com/jackyzha0/quartz.git (push)
upstream        https://github.com/jackyzha0/quartz.git (fetch)
upstream        https://github.com/jackyzha0/quartz.git (push)
Run the following command to remove the current origin address with your own github repository;
git remote rm origin

# Copy the link in the step 4 and type
git remote add origin https://github.com/alptugan/blog-teaching.git

# Upload your content in your local computer to the Github repository that we created in the Step 3
npx quartz sync --no-pull
4. Create the static web site
Open Terminal app and goto the Quartz project folder. Mine is “blog-teaching.” We will create deploy.yml file to compile and upload the static web-site that we created on our local machine. Navigate to the Quartz 4 documentation page Copy its content.
nano .github/workflows/deploy.yml

# Paste the content inside the editor.
# Hit Ctrl + o to save document
# Hit Ctrl + x to quit the document.
Goto Github repository page that you created. Hit settings icon ⚙️
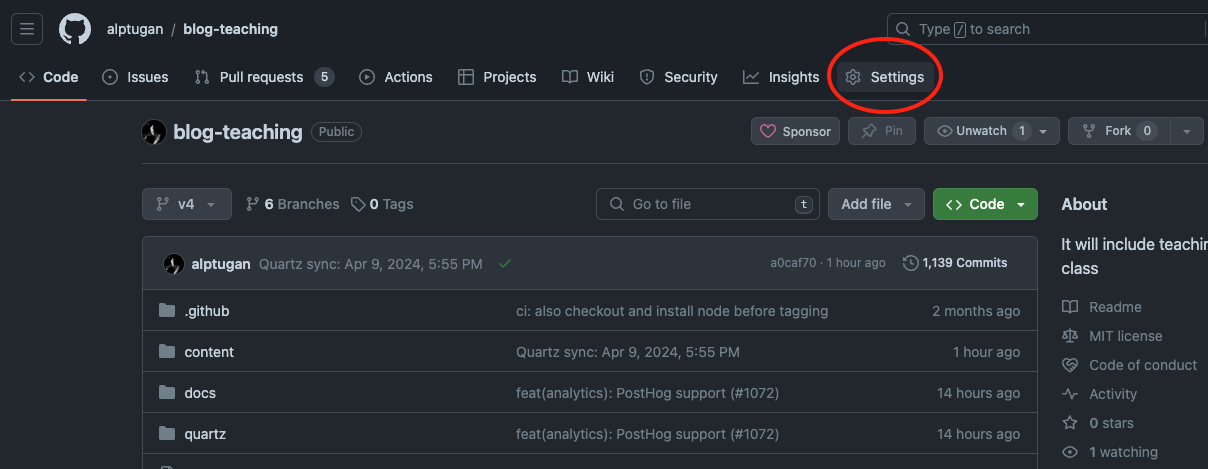
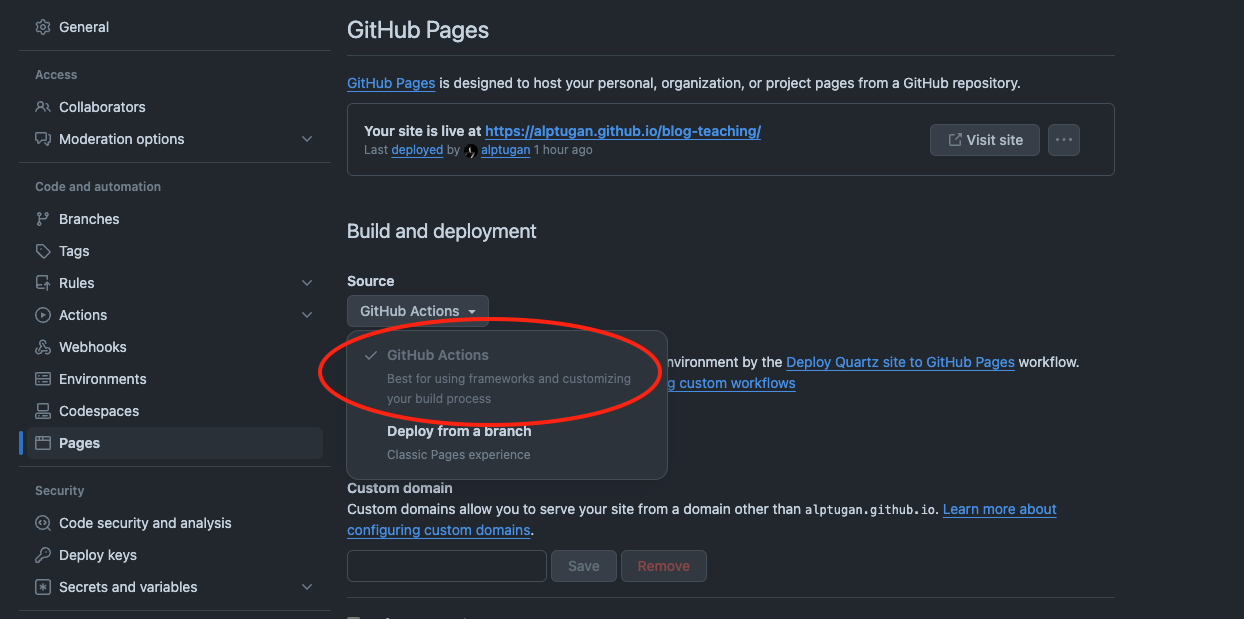
Select Pages;

Select Source > Github Actions
Open Terminal and sync the content to upload deploy.yml file
npx quartz sync

# Wait a few minutes.
Navigate to your static website
https://yourusername.github.io/name_of_your_repository
Mine is;
https://alptugan.github.io/blog-teaching
How to edit blog content within the same Obsidian vault
Check the following link to link the existing Quartz 4 folder to the original Obsidian
- Create the folder in original vault → blog-teaching. You don’t need to create
contentfolder. We will do it in the next step vialncommand. ln -s ../../DEVS/Sites/blog-teaching/content content- The original content folder now can be edited using your main vault. reference
F.A.Q
The images or the pages are not displayed correctly
- Make sure you follow all the steps.
- Sometimes it takes time for Github to compile and publish your web-site.
- Clear the browser cache and cookies.
- Try the same link with different browser.
References
- Nicole Vanderhoeven
- Quartz 4 Documentation
- Github Documentation
- Github Pages
- Obsidian Documentation