Introduction
Before we start coding, it’s helpful to first understand how computers use machine learning to recognize images. Check out this video for a good introduction.
Collect Samples
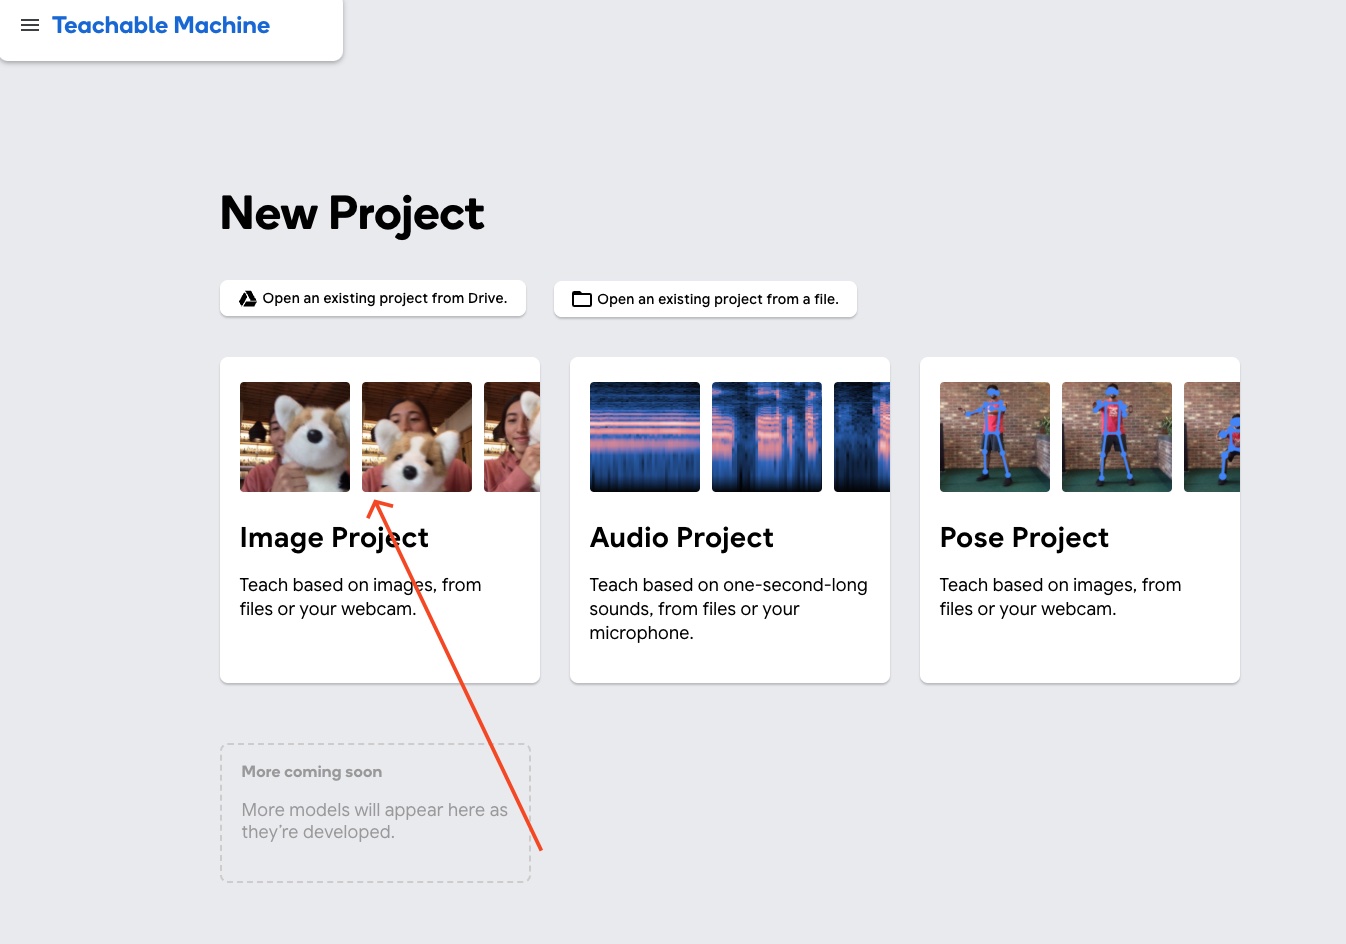
Goto Teachable Machine web site. Hit Get Started. Then choose Image Project to train your model with a specific image that you want to identify in your project. It can be an object, a human face or any other visual thing that you want to make your app identifies whenever the camera see it.
On the following screen, choose Standart image model option to proceed training section.
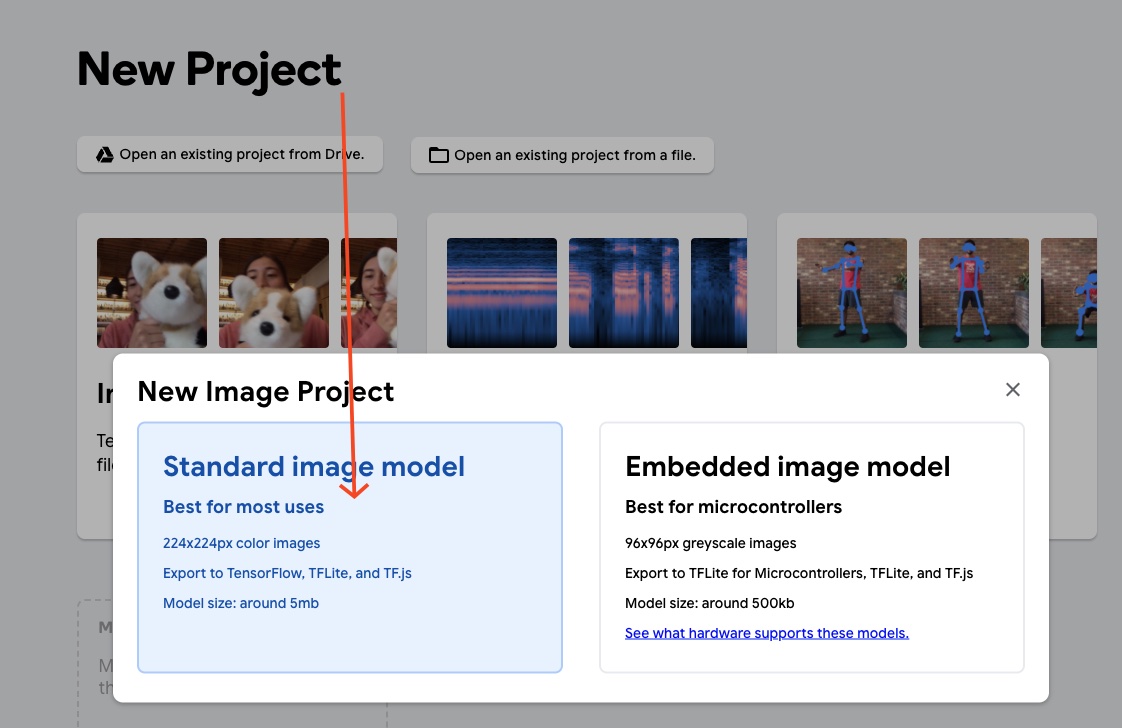
You will see the following screen;
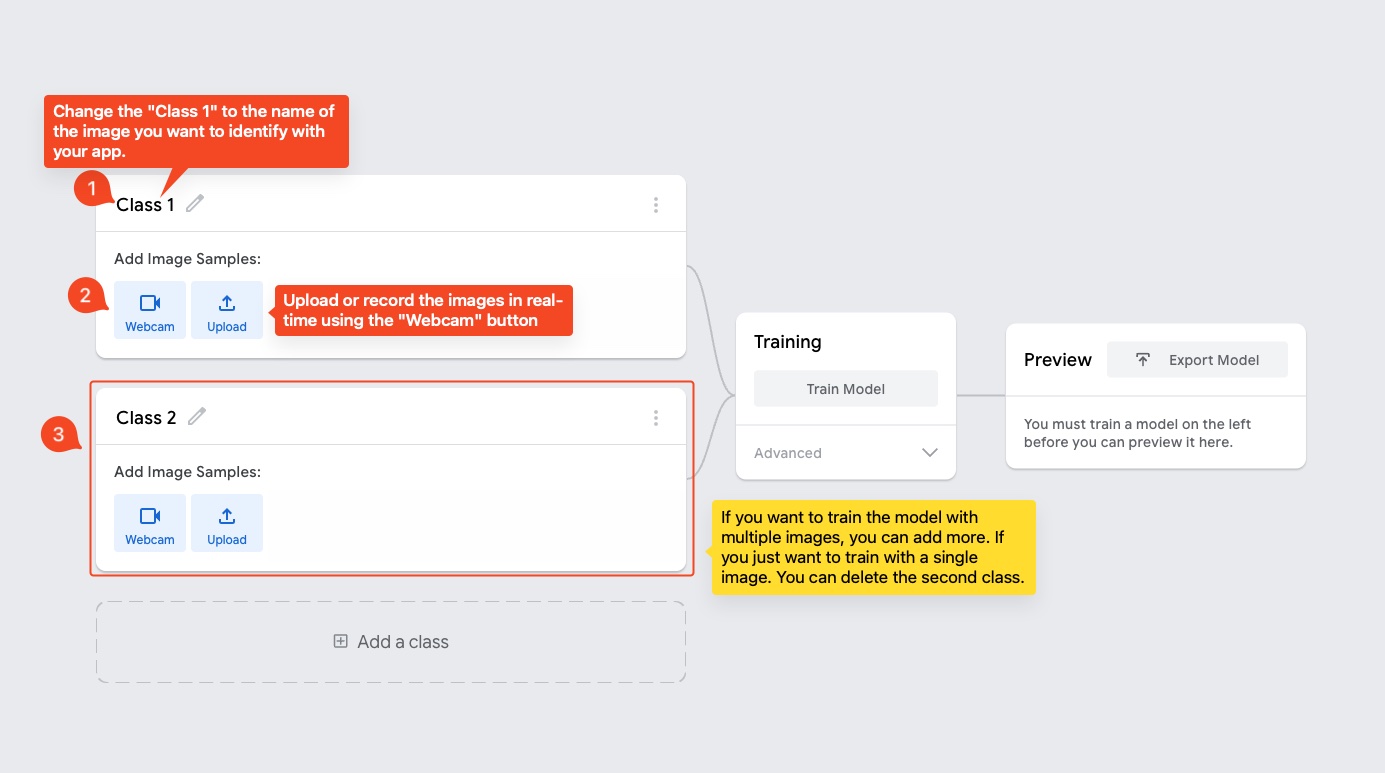
I use two different objects to make my app identify them. The first is a book titled “Object Oriented Ontology” and the second one the starfish character called Patrick from the Sponge Bob cartoon series.
In order to train a model with a specific image,
- Hit the Webcam to capture the image in real-time. If you have images prepared beforehand you can upload them one by one.
- Record or upload at least 100 sample of the object from different angles and distances.
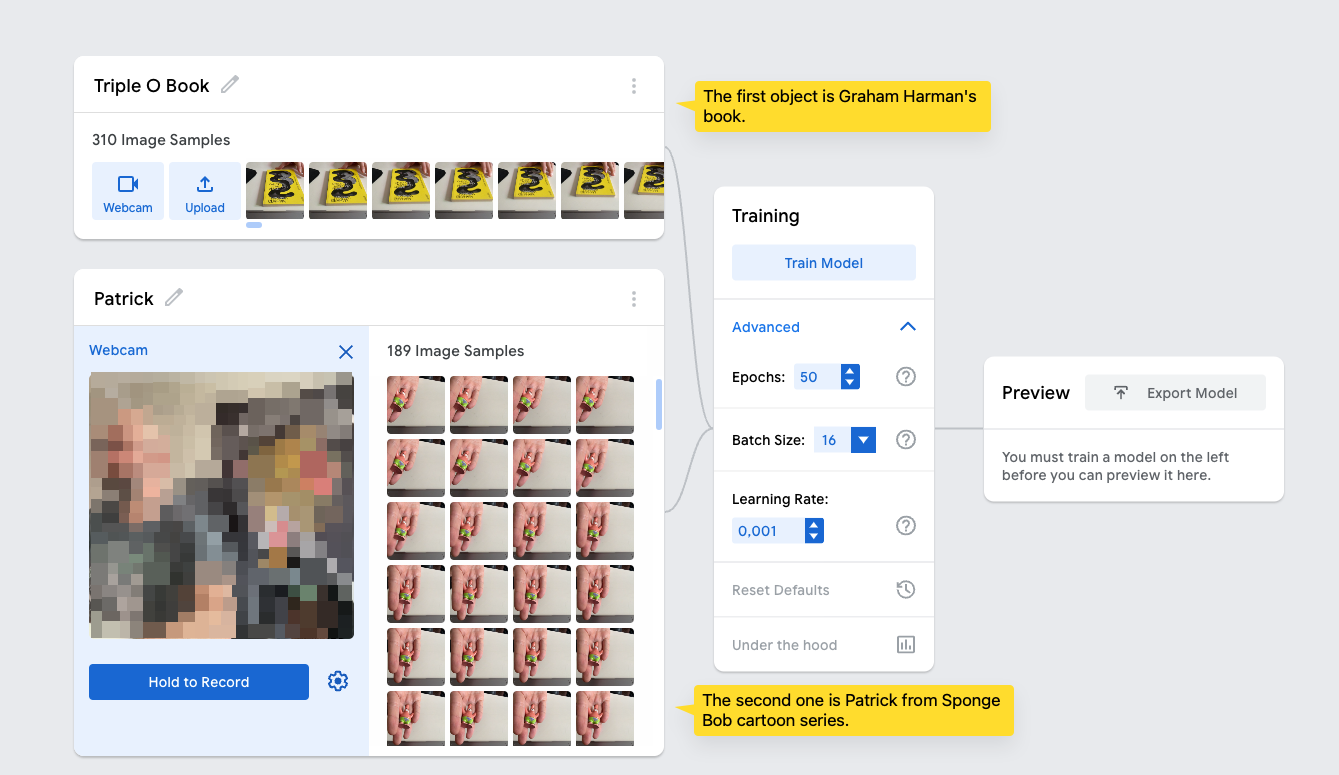
Train the Model
In the node graph, next step is Training the MobileNet pre-trained model with our custom samples. You can leave the settings with default values. You can get more information about the settings by hover over the ? icon. For basic information,
- Epoch: Increase this value to increase accuracy of image detection.
- Batch Size: You can leave it with default value.
- Learning Rate: You can leave it with default value. Even small changes on that value may create dramatic effects.
During the model training process do not close the page, wait until it ends.
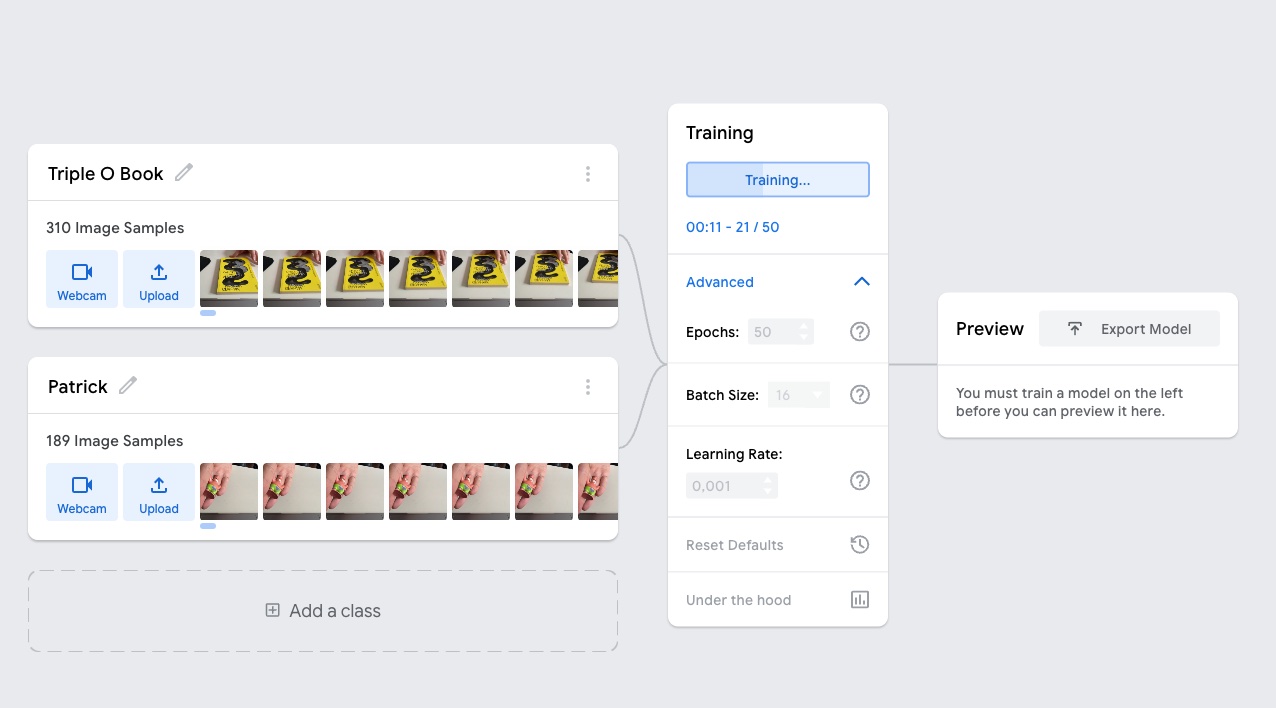
During the training, it is a good practice to capture the background as a default image sample. Name the class as "background" to keep it separate from your images.
When the training is done, you can test model to see, if it works good enough. If you are satisfied with the results you can hit Export Model.
When you hit the export button, you will see a new pop-up page. You can upload the data to google cloud and use the link to load your trained samples over MobilNet model.
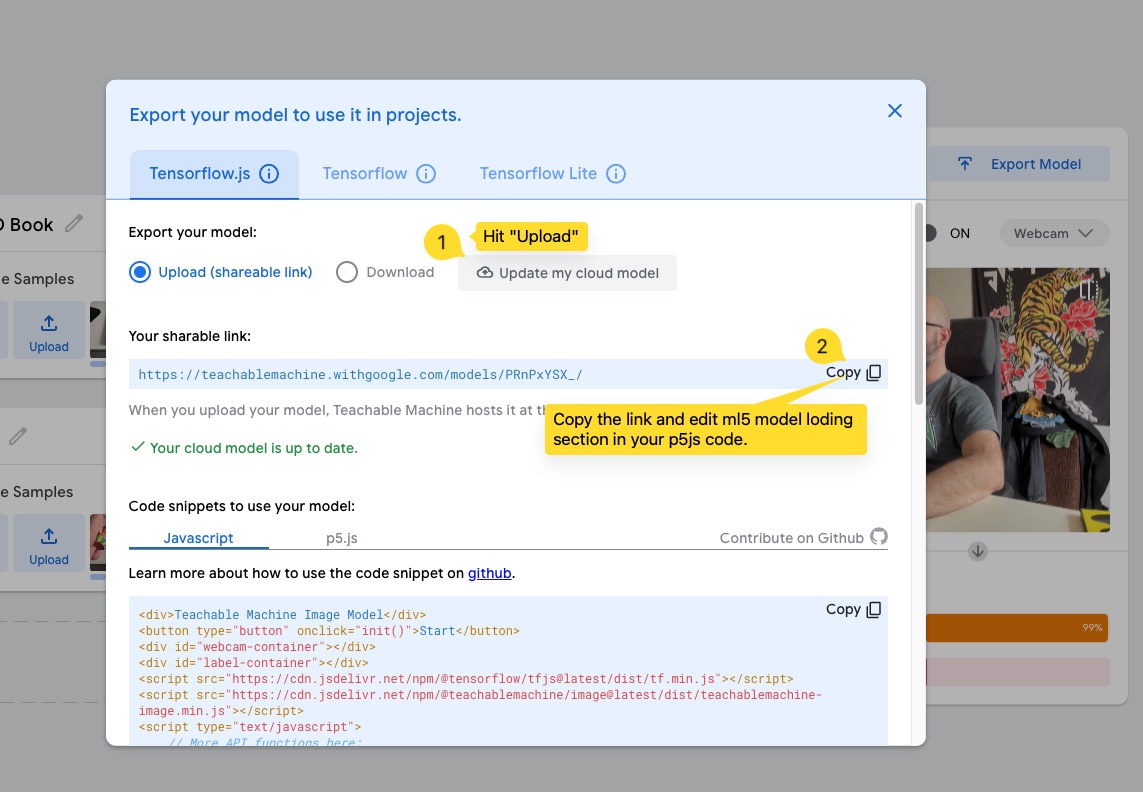
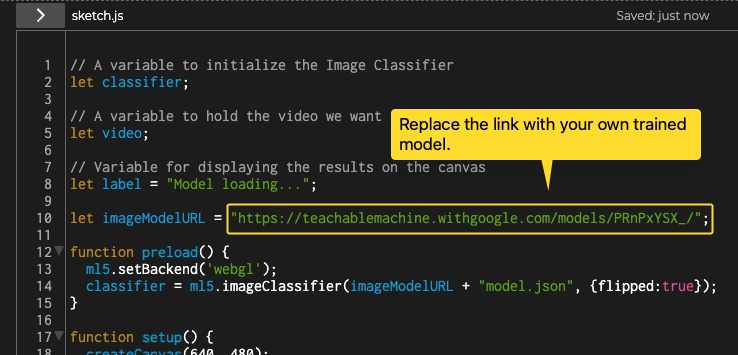
The copied URL is your trained model’s location on Google server. In order to load the customized model into your project, use the following code as a boiler plate. Replace the URL of imageModelURL variable with yours.
// A variable to initialize the Image Classifier
let classifier;

// A variable to hold the video we want to classify
let video;

// Variable for displaying the results on the canvas
let label = "Model loading...";

let imageModelURL = "https://teachablemachine.withgoogle.com/models/gUUabHWuV/";

function preload() {
  ml5.setBackend('webgl');
  classifier = ml5.imageClassifier(imageModelURL, {flipped:true});
}

function setup() {
  createCanvas(640, 480);

  // Create the webcam video and hide it
  video = createCapture(VIDEO, { flipped: true });
  video.size(640, 480);
  video.hide();

  // Start detecting objects in the video
  classifier.classifyStart(video, gotResult);
}

function draw() {
  // Each video frame is painted on the canvas
  image(video, 0, 0);

  // Printing class with the highest probability on the canvas
  fill(0, 255, 0);
  textSize(32);
  text(label, 20, 50);
}

// A function to run when we get the results
function gotResult(results) {
  // Update label variable which is displayed on the canvas
  label = results[0].label;

  //  console.log(results)
}Troubleshoot
It doesn't identify the image correctly
You need to keep the environment same. Otherwise it cannot respond accurately. For instance; if you capture the image of the sample in a dark room, this means that you model is trained for dark room.That being said, it doesn’t know what does you image look like in day light.
When nothing is pointed to the camera, it displays wrong label.
During the training, it is a good practice to capture the background as well of the your sampling area.
References
- Reference | ml5 - A friendly machine learning library for the web.
- Image Classification / The Coding Train