Introduction
This tutorial enhances the instructional content provided by Daniel Shiffman on implementing the ml5 - facemesh technique, which elucidates methodologies for recognizing and detecting an individual’s facial features via a webcam interface…
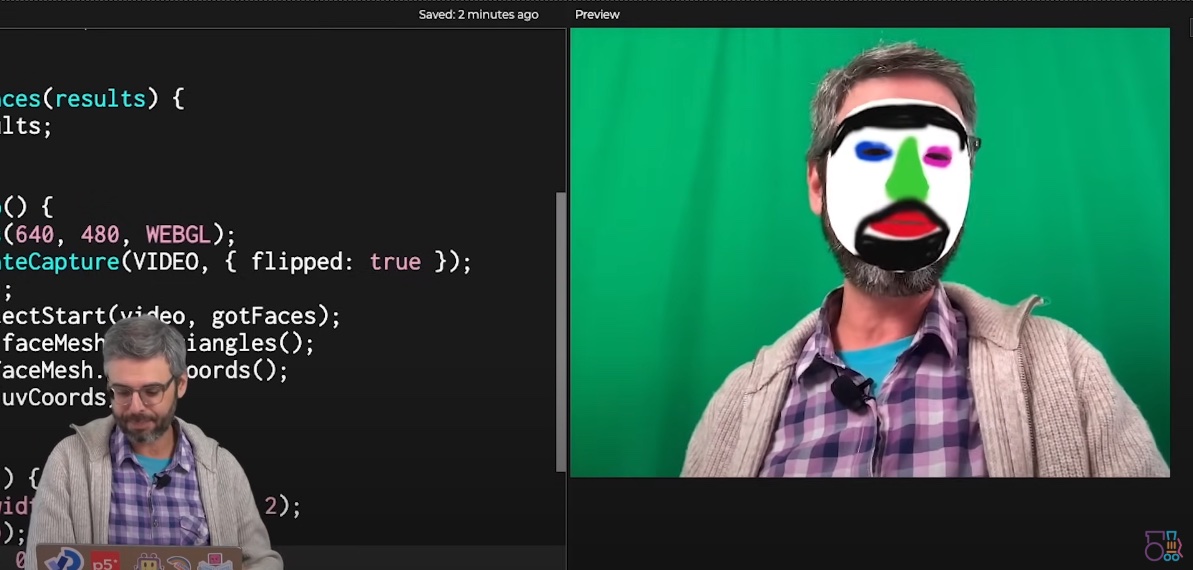
Prior to advancing, it is essential to view the tutorial and independently adhere to its guidelines. Merely observing and duplicating the code will not facilitate a comprehensive understanding of the underlying methodology.
The tutorial is enhanced by incorporating several mask images that automatically change each time the application resumes facial tracking and recognition. Additionally, adjustments are made to the codebase to enable effective multi-face detection functionality.
1. Designing Masks
The ml5 library leverages TensorFlow, an open-source machine learning framework, to develop a mask design that conforms to a human face by utilizing a template file for positioning key facial features such as the eyes, nose, and mouth.
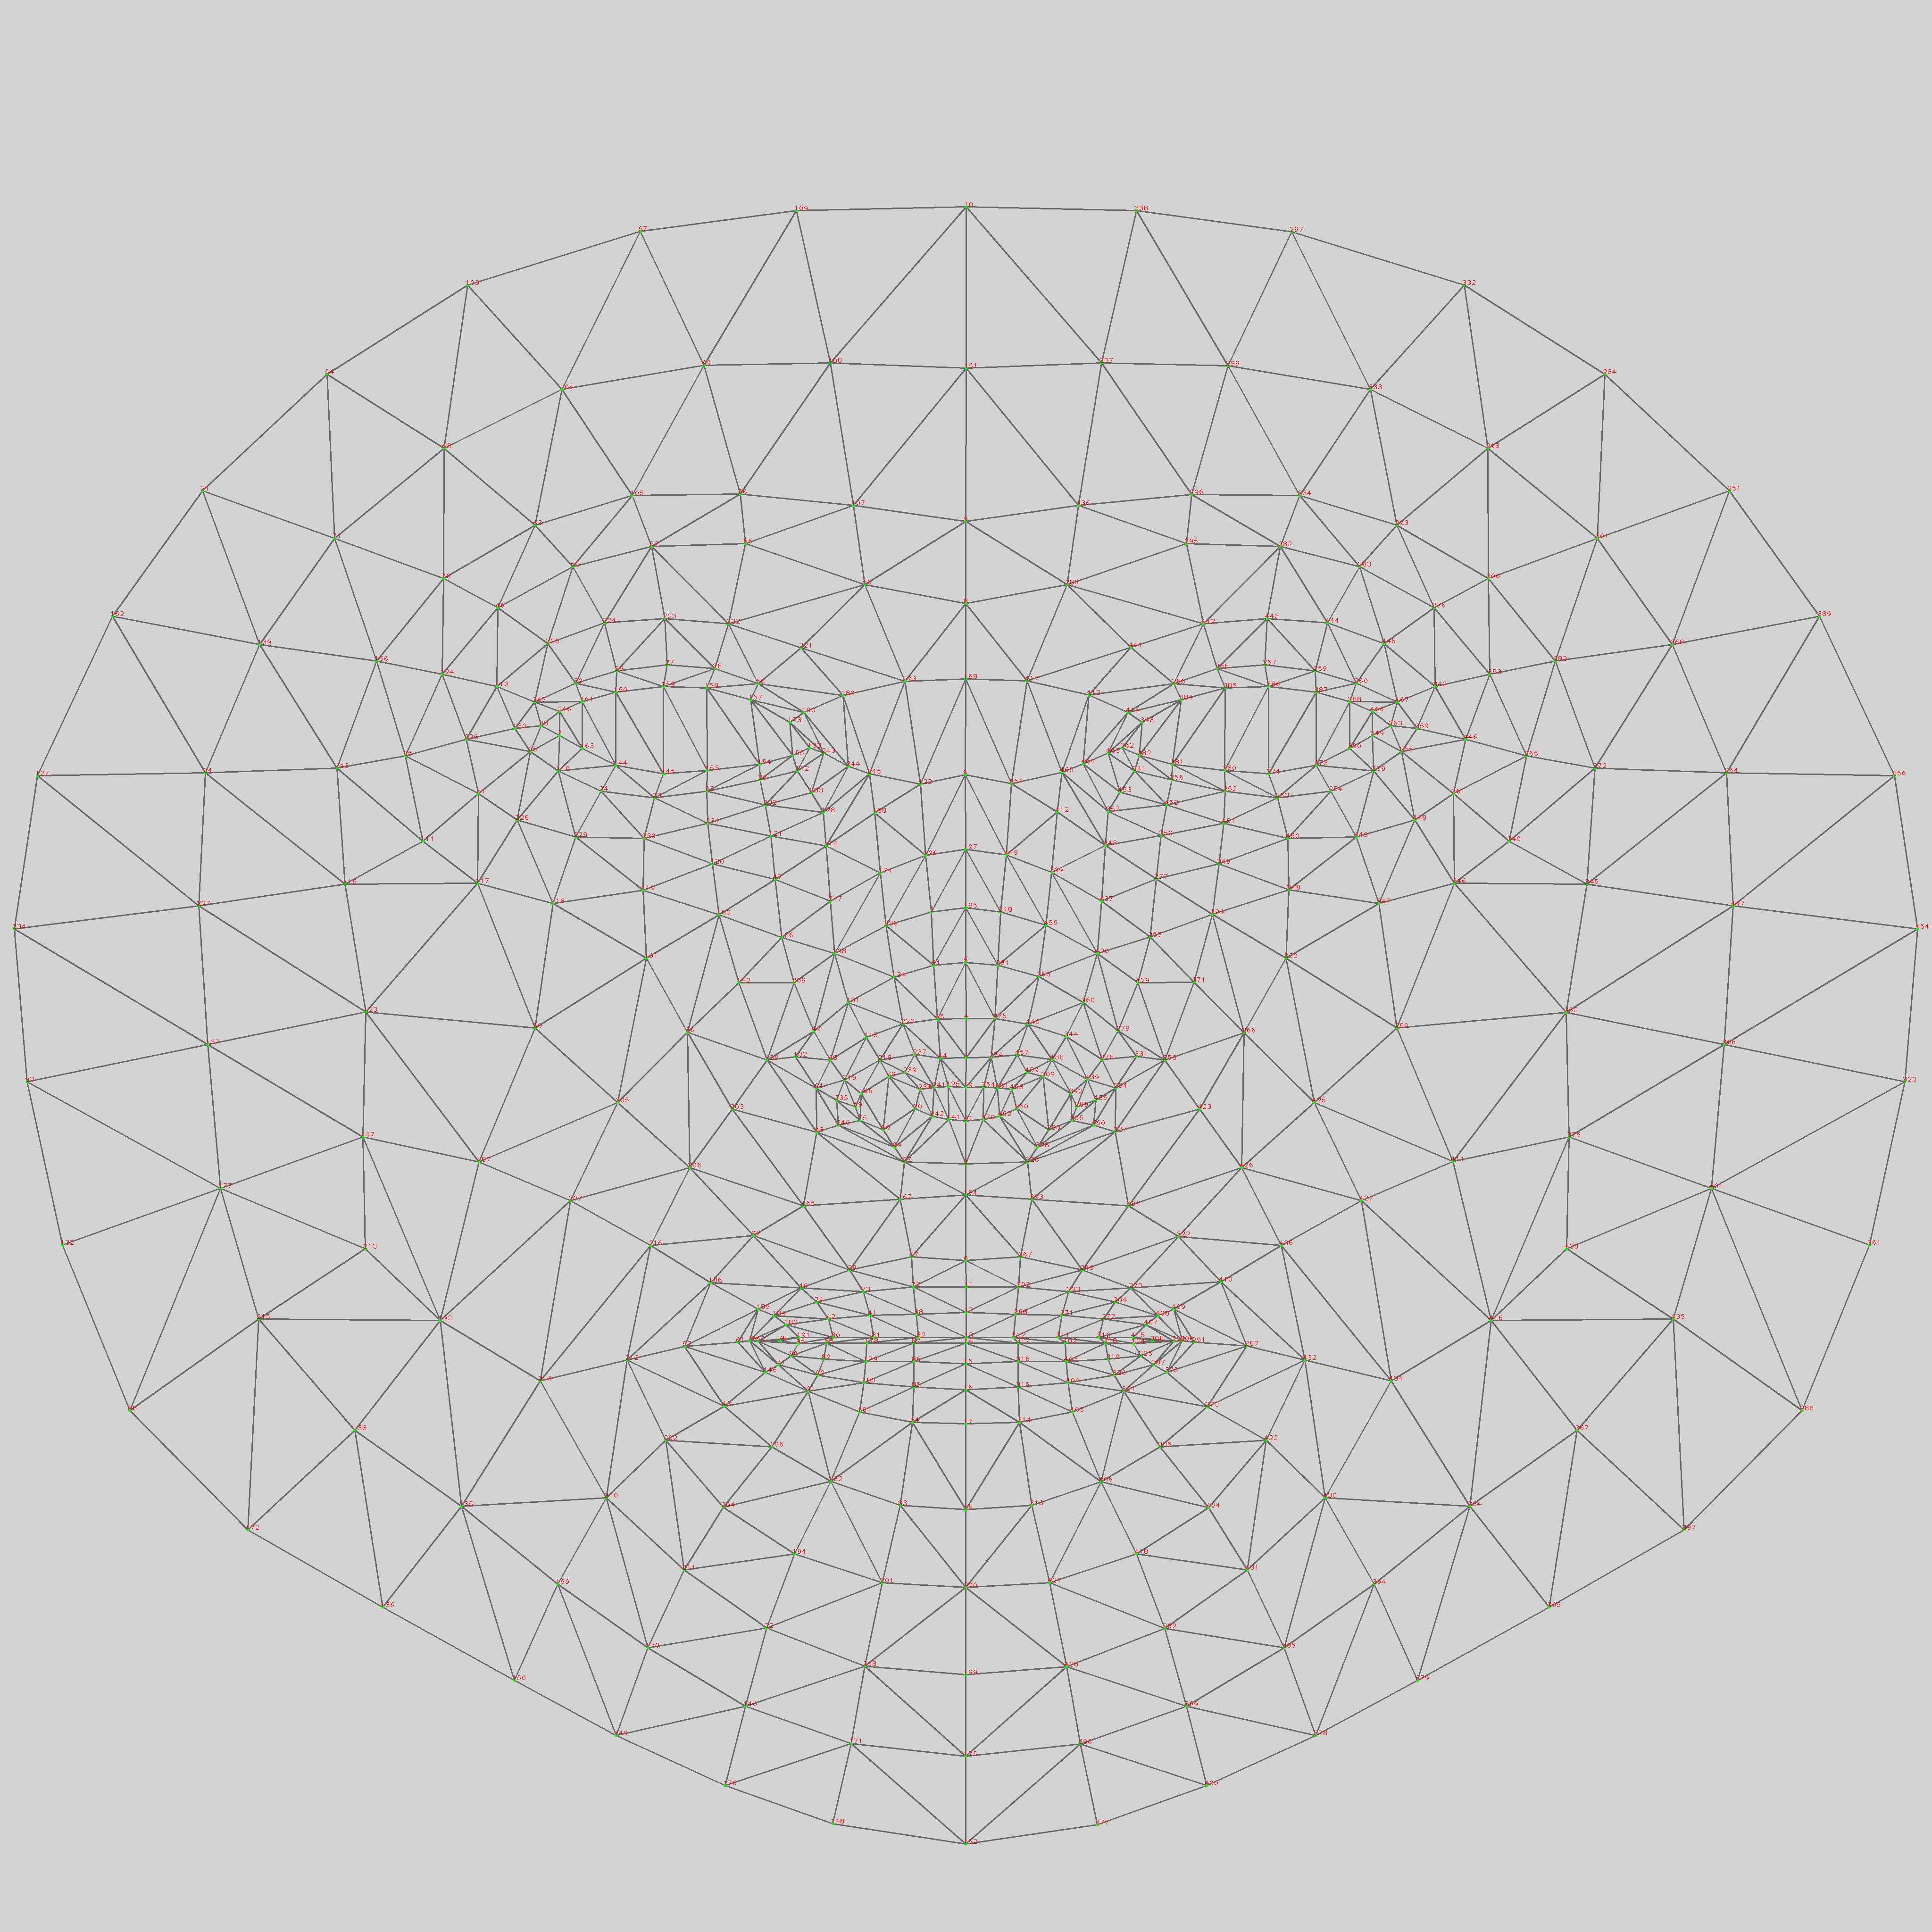
Initiate by opening the template mesh file within a graphic editing application. Position the mask on the uppermost layer, then proceed to delineate your intended mask based on predefined key points.
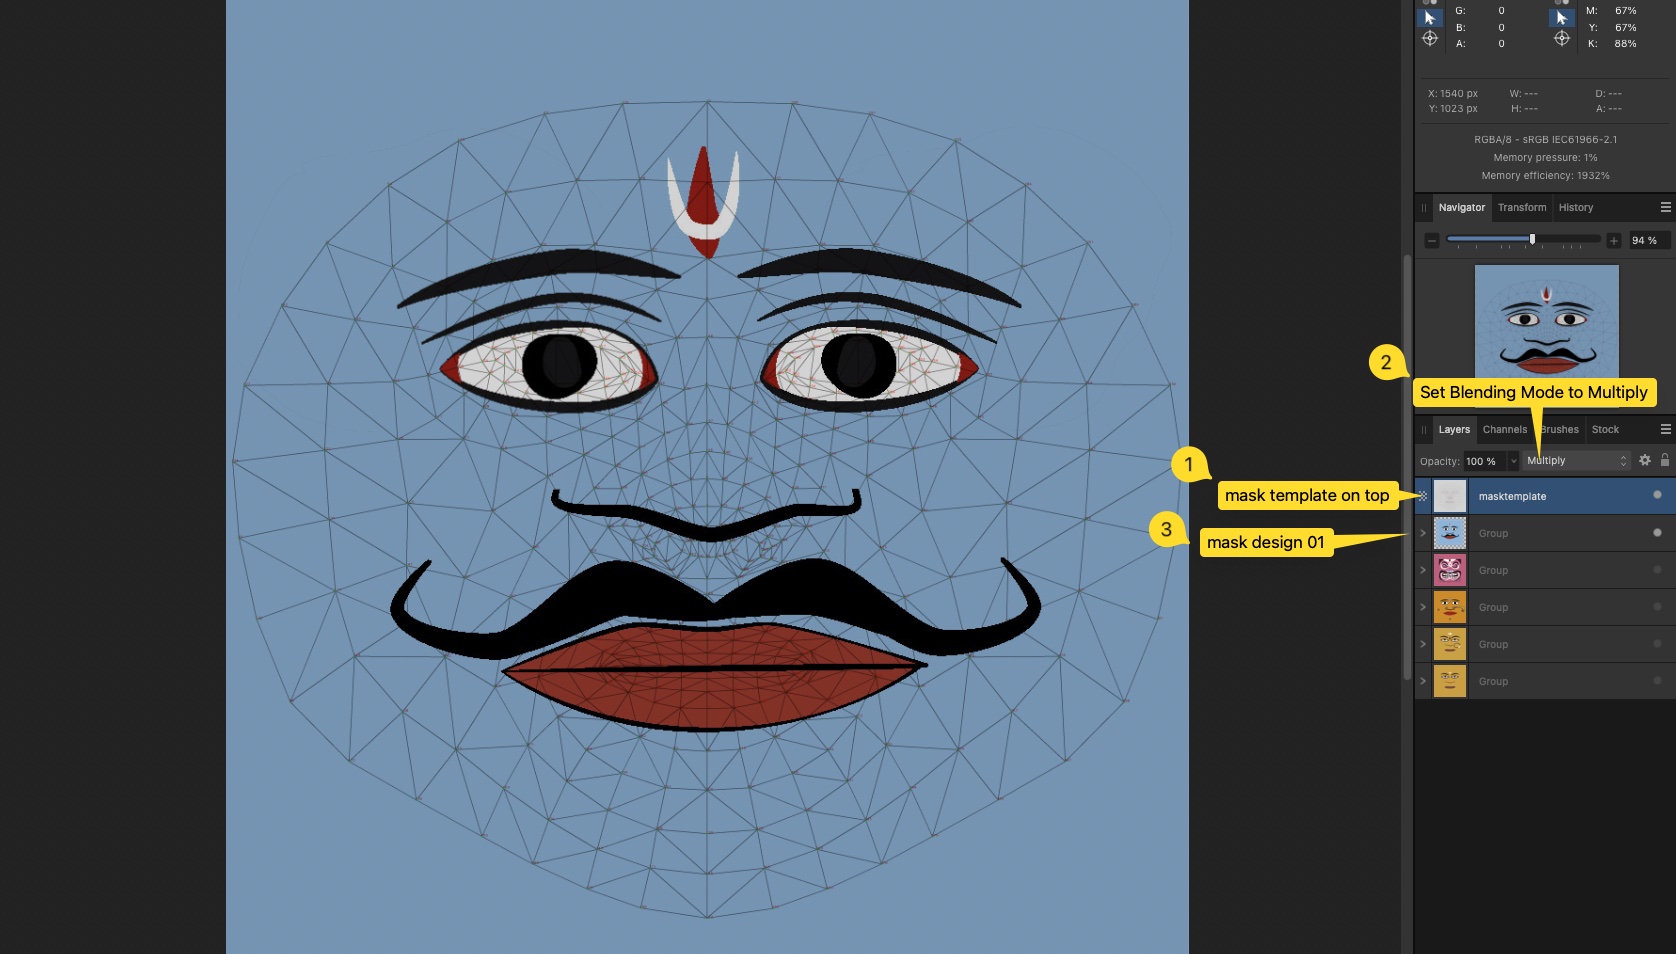
When you export each mask design, remember to hide the top layer first. Put all these saved masks in a folder named so everything stays neat and tidy. Then we’ll load those images into our p5.js project.
2. Upload Images
Open p5js project settings and create a folder first.
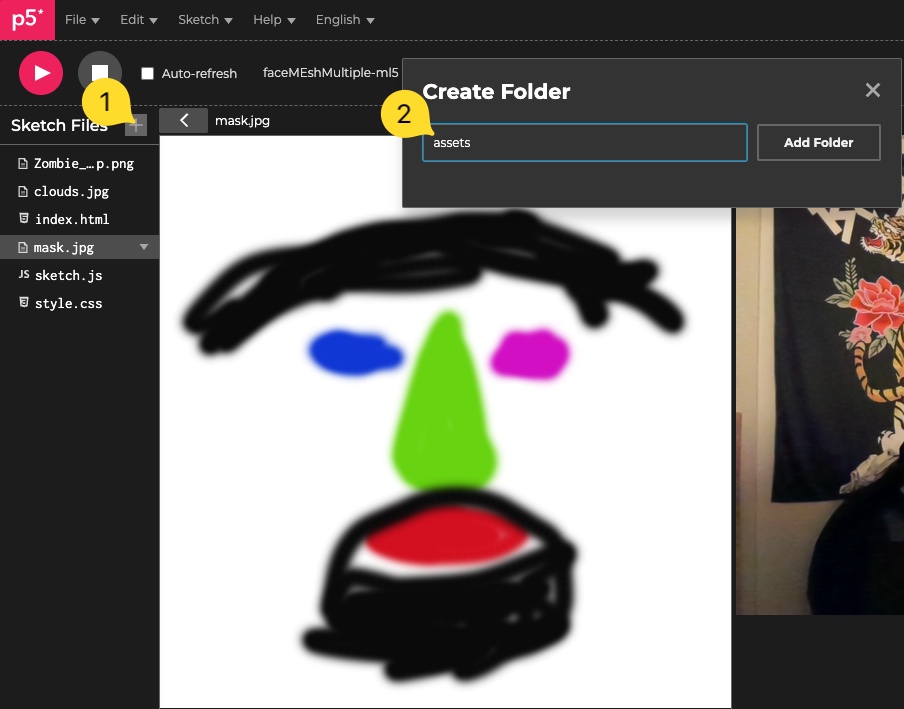
After that, put the mask pictures in that folder.
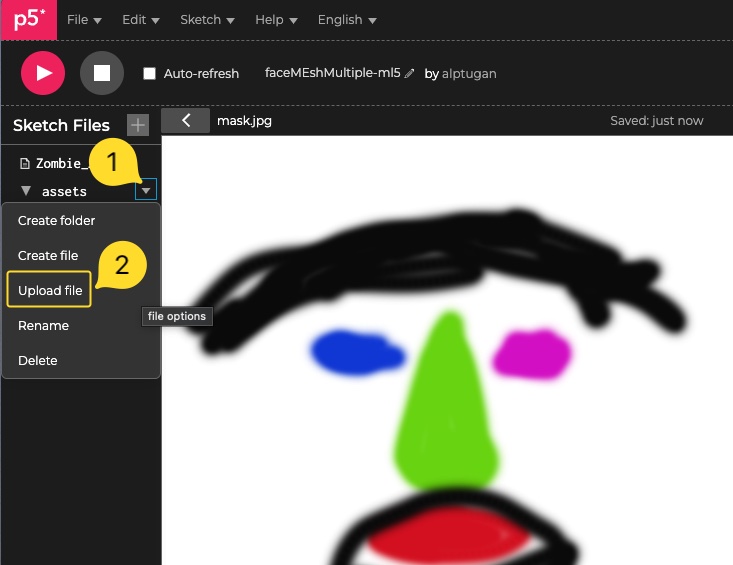
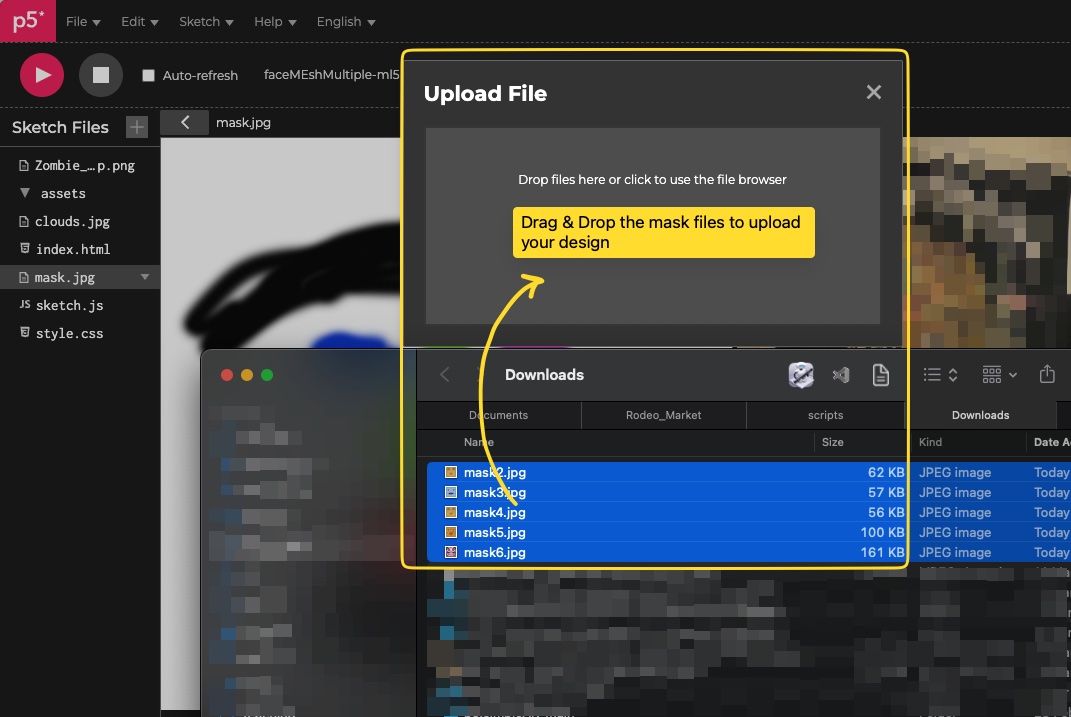
3. Edit the Codebase
Goto the link and duplicate the code into your online account. You can use p5js or openProcessing editor. Do not forget add library paths to the index.html document.
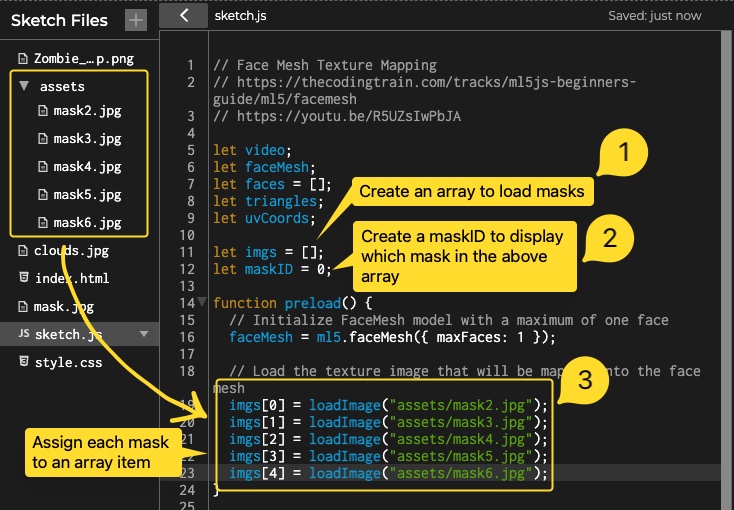
In order to enable randomly set the mask id, we need to determine a trigger action. We can determine when there is a mask and not according to the line 64 in the code below;
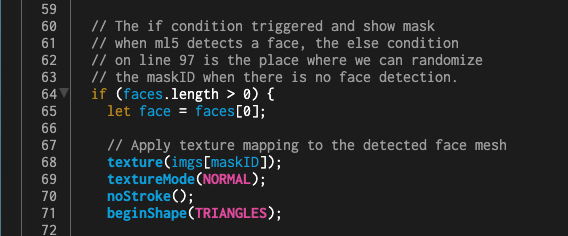
The if condition above tells the app there is a face detected, because whenever ml5 detects a face, it adds the face data into the faces array. So, the length of the array gets larger than 0. Then, the app runs the code inside the if condition to display the mask positioned onto the user’s face.
The else condition below, tells the app that there is no face detected. So, we can generate random maskID number between 0 and number of masks we load in the preload() function.
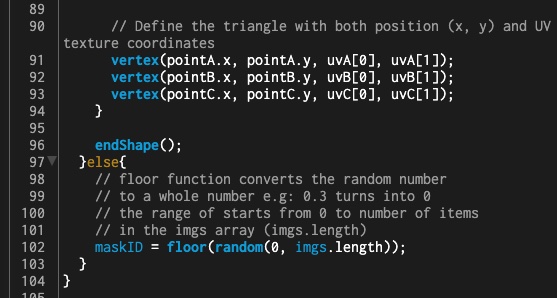
You can review the complete code below;
// Face Mesh Texture Mapping
// https://thecodingtrain.com/tracks/ml5js-beginners-guide/ml5/facemesh
// https://youtu.be/R5UZsIwPbJA
let video;
let faceMesh;
let faces = [];
let triangles;
let uvCoords;

let imgs = [];
let maskID = 0;

function preload() {
  // Initialize FaceMesh model with a maximum of one face
  faceMesh = ml5.faceMesh({ maxFaces: 1 });

  // Load the texture image that will be mapped onto the face mesh
  imgs[0] = loadImage("assets/mask2.jpg");
  imgs[1] = loadImage("assets/mask3.jpg");
  imgs[2] = loadImage("assets/mask4.jpg");
  imgs[3] = loadImage("assets/mask5.jpg");
  imgs[4] = loadImage("assets/mask6.jpg");
}

function mousePressed() {
  // Log detected face data to the console
  console.log(faces);
}

function gotFaces(results) {
  faces = results;
}

function setup() {
  createCanvas(640, 480, WEBGL);
  video = createCapture(VIDEO);
  video.hide();

  // Start detecting faces
  faceMesh.detectStart(video, gotFaces);

  // Retrieve face mesh triangles and UV coordinates
  triangles = faceMesh.getTriangles();
  uvCoords = faceMesh.getUVCoords();

  // Set the mask ID
  maskID = 4;
}

function draw() {
  // Center the 3D space to align with the canvas
  translate(-width / 2, -height / 2);
  background(0);

  // Display the video feed
  image(video, 0, 0);


  // The if condition triggered and show mask
  // when ml5 detects a face, the else condition
  // on line 97 is the place where we can randomize
  // the maskID when there is no face detection.
  if (faces.length > 0) {
    let face = faces[0];

    // Apply texture mapping to the detected face mesh
    texture(imgs[maskID]);
    textureMode(NORMAL);
    noStroke();
    beginShape(TRIANGLES);

    // Loop through each triangle in the face mesh
    for (let i = 0; i < triangles.length; i++) {
      let tri = triangles[i];

      // Get the indices of the three points that form a triangle
      let [a, b, c] = tri;

      // Retrieve the corresponding 2D face keypoints
      let pointA = face.keypoints[a];
      let pointB = face.keypoints[b];
      let pointC = face.keypoints[c];

      // Retrieve the corresponding UV coordinates for texture mapping
      let uvA = uvCoords[a];
      let uvB = uvCoords[b];
      let uvC = uvCoords[c];

      // Define the triangle with both position (x, y) and UV texture coordinates
      vertex(pointA.x, pointA.y, uvA[0], uvA[1]);
      vertex(pointB.x, pointB.y, uvB[0], uvB[1]);
      vertex(pointC.x, pointC.y, uvC[0], uvC[1]);
    }

    endShape();
  }else{
    // floor function converts the random number
    // to a whole number e.g: 0.3 turns into 0
    // the range of starts from 0 to number of items
    // in the imgs array (imgs.length)
    maskID = floor(random(0, imgs.length));
  }
}
4. Enable Multiple Face Detection
Review the code to see how to make multiple detection in action. Focus on the removed and edited code sections.
In order to enable multiple face detection, we change maxFaces:1 to maxFaces:4 in the preload() function. You can increase or decrease the value according to your project’s requirements.
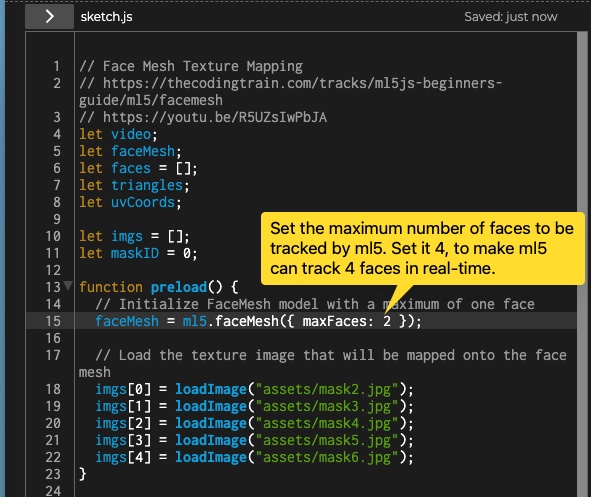
Then, we need to update the draw()function to allow the app detect multiple faces, and display different masks on each detected face. To achieve that, we create a for loop to collect all of the faces.
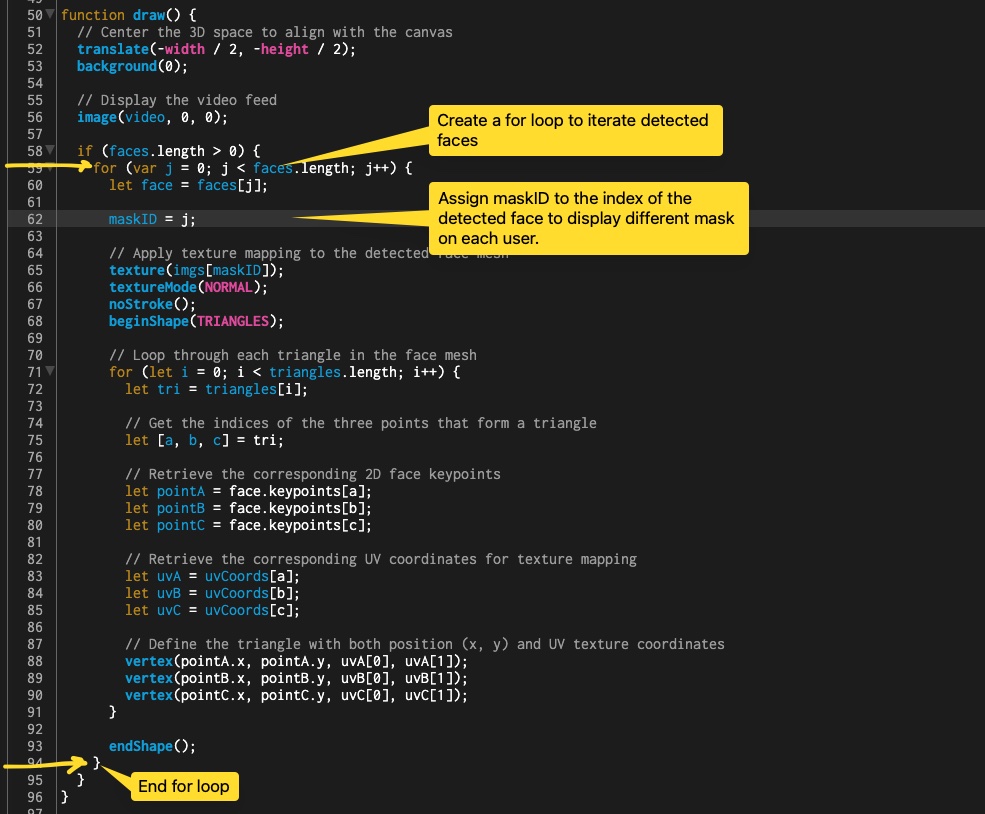
In the previous code, Shiffman’s app captures the first face in the faces array. Because of that we edit following code on line 60. Check the overall code below;
// Face Mesh Texture Mapping
// https://thecodingtrain.com/tracks/ml5js-beginners-guide/ml5/facemesh
// https://youtu.be/R5UZsIwPbJA
let video;
let faceMesh;
let faces = [];
let triangles;
let uvCoords;

let imgs = [];
let maskID = 0;

function preload() {
  // Initialize FaceMesh model with a maximum of one face
  faceMesh = ml5.faceMesh({ maxFaces: 4 });

  // Load the texture image that will be mapped onto the face mesh
  imgs[0] = loadImage("assets/mask2.jpg");
  imgs[1] = loadImage("assets/mask3.jpg");
  imgs[2] = loadImage("assets/mask4.jpg");
  imgs[3] = loadImage("assets/mask5.jpg");
  imgs[4] = loadImage("assets/mask6.jpg");
}

function mousePressed() {
  // Log detected face data to the console
  console.log(faces);
}

function gotFaces(results) {
  faces = results;
}

function setup() {
  createCanvas(640, 480, WEBGL);
  video = createCapture(VIDEO);
  video.hide();

  // Start detecting faces
  faceMesh.detectStart(video, gotFaces);

  // Retrieve face mesh triangles and UV coordinates
  triangles = faceMesh.getTriangles();
  uvCoords = faceMesh.getUVCoords();

  // Set the mask ID
  maskID = 4;
}

function draw() {
  // Center the 3D space to align with the canvas
  translate(-width / 2, -height / 2);
  background(0);

  // Display the video feed
  image(video, 0, 0);

  if (faces.length > 0) {
    for (var j = 0; j < faces.length; j++) {
      let face = faces[j];

      maskID = j;

      // Apply texture mapping to the detected face mesh
      texture(imgs[maskID]);
      textureMode(NORMAL);
      noStroke();
      beginShape(TRIANGLES);

      // Loop through each triangle in the face mesh
      for (let i = 0; i < triangles.length; i++) {
        let tri = triangles[i];

        // Get the indices of the three points that form a triangle
        let [a, b, c] = tri;

        // Retrieve the corresponding 2D face keypoints
        let pointA = face.keypoints[a];
        let pointB = face.keypoints[b];
        let pointC = face.keypoints[c];

        // Retrieve the corresponding UV coordinates for texture mapping
        let uvA = uvCoords[a];
        let uvB = uvCoords[b];
        let uvC = uvCoords[c];

        // Define the triangle with both position (x, y) and UV texture coordinates
        vertex(pointA.x, pointA.y, uvA[0], uvA[1]);
        vertex(pointB.x, pointB.y, uvB[0], uvB[1]);
        vertex(pointC.x, pointC.y, uvC[0], uvC[1]);
      }

      endShape();
    }
  }
}
Do not forget to add ml5 library to the
index.htmlfile
<!DOCTYPE html>
<html lang="en">
  <head>
    <script src="https://cdnjs.cloudflare.com/ajax/libs/p5.js/1.10.0/p5.js"></script>
    <script src="https://unpkg.com/ml5@1/dist/ml5.min.js"></script>
    <link rel="stylesheet" type="text/css" href="style.css" />
    <meta charset="utf-8" />
  </head>
  <body>
    <main></main>
    <script src="sketch.js"></script>
  </body>
</html>